Stripe
This document guides you through setting up Stripe payments in your Medusa backend, admin, and storefront using the Stripe Plugin.
Video Guide
You can also follow this video guide to learn how the setup works:
Overview
Stripe is a battle-tested and unified platform for transaction handling. Stripe supplies you with the technical components needed to handle transactions safely and all the analytical features necessary to gain insight into your sales. These features are also available in a safe test environment which allows for a concern-free development process.
Using the medusa-payment-stripe plugin, this guide shows you how to set up your Medusa project with Stripe as a payment processor.
Prerequisites
Before you proceed with this guide, make sure you create a Stripe account. You’ll later retrieve the API Keys and secrets from your account to connect Medusa to your Stripe account.
Medusa Backend
This section guides you over the steps necessary to add Stripe as a payment processor to your Medusa backend.
If you don’t have a Medusa backend installed yet, you must follow the quickstart guide first.
Install the Stripe Plugin
In the root of your Medusa backend, run the following command to install the stripe plugin:
Configure the Stripe Plugin
Next, you need to add configurations for your stripe plugin.
In medusa-config.js add the following at the end of the plugins array:
The Stripe plugin uses two configuration options. The api_key is essential to both your development and production environments. As for the webhook_secret, it’s essential for your production environment. So, if you’re only using Stripe for development you can skip adding the value for this option at the moment.
You can learn more about the events that the plugin monitors in this section.
Other optional options include:
payment_description: a string that is used as the default description of a payment if none is provided.capture: a boolean value that indicates whether payment should be captured manually or automatically. By default, it will befalse, leading admins to capture the payment manually.automatic_payment_methods: a boolean value that enables Stripe's automatic payment methods. This is useful if you're integrating services like Apple pay or Google pay.webhook_delay: a number indicating the delay in milliseconds before processing the webhook event. By default, it's5000(five seconds).webhook_retries: The number of times to retry the webhook event processing in case of an error. By default, it's3.
Retrieve Stripe's Keys
On the dashboard of your Stripe account click on the Developers link at the top right. This will take you to the developer dashboard.
You’ll first retrieve the API key. You can find it by choosing API Keys from the sidebar and copying the Secret key.
Next, you need to add the key to your environment variables. In your Medusa backend, create .env if it doesn’t already exist and add the Stripe key:
If you store environment variables differently on your backend, for example, using the hosting processor’s UI, then you don’t need to add it in .env. Add the environment variables in a way relevant to your backend.
Next, if you’re installing this plugin for production use, you need to retrieve the Webhook secret. Webhooks allows you to track different events on your Medusa backend, such as failed payments.
Go to Webhooks on Stripe’s developer dashboard. Then, choose the Add an Endpoint button.
The endpoint for Stripe’s webhook on your Medusa backend is {BACKEND_URL}/stripe/hooks. So, add that endpoint in its field. Make sure to replace {BACKEND_URL} with the URL to your backend.
Then, you can add a description. You must select at least one event to listen to. Once you’re done, click “Add endpoint”.
After the Webhook is created, you’ll see "Signing secret" in the Webhook details. Click on "Reveal" to reveal the secret key. Copy that key and in your Medusa backend add the Webhook secret environment variable:
Admin Setup
This section will guide you through adding Stripe as a payment processor in a region using your Medusa Admin dashboard.
This step is required for you to be able to use Stripe as a payment processor in your storefront.
Admin Prerequisites
If you don’t have a Medusa Admin installed, make sure to follow along with the guide on how to install it before continuing with this section.
Add Stripe to Regions
You can refer to this documentation in the user guide to learn how to add a payment processor like Stripe to a region.
Storefront Setup
This guide will take you through how to set up Stripe payments in your Medusa storefront. It includes the steps necessary when using one of Medusa’s official storefronts as well as your own custom React-based storefront.
Storefront Prerequisites
All storefronts require that you obtain your Stripe’s Publishable Key. You can retrieve it from your Stripe’s developer dashboard by choosing API Keys and then copying the Publishable Key.
Add to Next.js Starter Template
Medusa has a Next.js Starter Template that you can easily use with your Medusa backend. If you don’t have the storefront installed, you can follow this quickstart guide.
In your .env.local file (or the file you’re using for your environment variables), add the following variable:
Make sure to replace <YOUR_PUBLISHABLE_KEY> with your Stripe Publishable Key.
Now, if you run your Medusa backend and your storefront, on checkout you’ll be able to use Stripe.

Add to Custom Storefront
This section will go over how to add Stripe into a React-based framework. The instructions are general instructions that you can use in your storefront.
Workflow Overview
The integration with stripe must have the following workflow:
- During checkout when the user reaches the payment section, you should create payment sessions. This will initialize the
payment_sessionsarray in thecartobject received. Thepayment_sessionsis an array of available payment processors. - If Stripe is available as a payment processor, you should select Stripe as the payment session for the current cart. This will initialize the
payment_sessionobject in thecartobject to include data related to Stripe and the current payment session. This includes the payment intent and client secret. - After the user enters their card details and submits the form, confirm the payment with Stripe.
- If the payment is confirmed successfully, complete the cart in Medusa. Otherwise show an error.
Install Dependencies
Before you start the implementations you need to install the necessary dependencies. You’ll be using Stripe’s React libraries to show the UI and handle the payment confirmation:
You’ll also use Medusa’s JS Client to easily call Medusa’s REST APIs:
Initialize Stripe
In this section, you’ll initialize Stripe without Medusa’s checkout workflow. Please note that this is one approach to add Stripe into your React project. You can check out Stripe’s React documentation for other methods or components.
Create a container component that will hold the payment card component:
import { useState } from "react"

import { Elements } from "@stripe/react-stripe-js"
import Form from "./Form"
import { loadStripe } from "@stripe/stripe-js"

const stripePromise = loadStripe("pk_...")

export default function Container() {
  const [clientSecret, setClientSecret] = useState()

  // TODO set clientSecret

  return (
    <div>
      {clientSecret && (
        <Elements stripe={stripePromise} options={{
          clientSecret,
        }}>
        <Form clientSecret={clientSecret} cartId={cartId} />
      </Elements>
      )}
    </div>
  )
};
In this component, you need to use Stripe’s loadStripe function outside of the component’s implementation to ensure that Stripe doesn’t re-load with every change. The function accepts the Publishable Key.
You’ll probably store this Publishable Key in an environment variable depending on your framework. It’s hard-coded here for simplicity.
Then, inside the component’s implementation, you add a state variable clientSecret which you’ll retrieve in the next section.
Once the clientSecret is set, the Elements Stripe component will wrap a Form component you’ll create next. This is necessary because the Elements component allows child elements to get access to the card’s inputs and their data using Stripe’s useElements hook.
Create a new file for the Form component with the following content:
import {
  CardElement,
  useElements,
  useStripe,
} from "@stripe/react-stripe-js"

export default function Form({ clientSecret, cartId }) {
  const stripe = useStripe()
  const elements = useElements()

  async function handlePayment(e) {
    e.preventDefault()
    // TODO handle payment
  }

  return (
    <form>
      <CardElement />
      <button onClick={handlePayment}>Submit</button>
  </form>
  )
};
This component shows a CardElement component from Stripe’s React library. You can use stripe to be able to confirm the payment later. The elements variable will be used to retrieve the entered card details safely.
Implement the Workflow
You’ll now implement the workflow explained earlier. You’ll use Medusa’s JS Client, so make sure to import it and initialize it in your Container component:
In your storefront, you’ll probably be managing the Medusa client through a context for better performance.
Then, in the place of the //TODO inside the Container element, initialize the payment sessions and create a payment session if Stripe is available:
client.carts.createPaymentSessions(cart.id)
  .then(({ cart }) => {
    // check if stripe is selected
    const isStripeAvailable = cart.payment_sessions?.some(
      (session) => (
        session.provider_id === "stripe"
      )
    )
    if (!isStripeAvailable) {
      return
    }

    // select stripe payment session
    client.carts.setPaymentSession(cart.id, {
      provider_id: "stripe",
    }).then(({ cart }) => {
      setClientSecret(cart.payment_session.data.client_secret)
    })
  })
Notice that here it’s assumed you have access to the cart object throughout your storefront. Ideally, the cart should be managed through a context. So, every time the cart is updated, for example, when the createPaymentSessions or setPaymentSession are called, the cart should be updated in the context to be accessed from other elements. In this case, you probably wouldn’t need a clientSecret state variable as you can use the client secret directly from the cart object.
Once the client secret is set, the form will be shown to the user.
The last step in the workflow is confirming the payment with Stripe and if it’s done successfully, completing the user’s order. This part is done in the Form component.
As you’ll use Medusa’s client again make sure to import it and initialize it:
Then, replace the //TODO in the handlePayment function with the following content:
return stripe.confirmCardPayment(clientSecret, {
  payment_method: {
    card: elements.getElement(CardElement),
    billing_details: {
      name,
      email,
      phone,
      address: {
        city,
        country,
        line1,
        line2,
        postal_code,
      },
    },
  },
}).then(({ error, paymentIntent }) => {
  // TODO handle errors
  client.carts.complete(cartId).then(
    (resp) => console.log(resp)
  )
})
You use the confirmCardPayment method in the stripe object. You’ll need to pass it the client secret, which you can have access to from the cart object if it’s available through the context.
This method also requires the customer’s information like name, email, and their address. Make sure to place the values for each based on your implementation.
Once the promise resolves you can handle the errors, if there are any. If not, you can complete the customer’s order using complete from Medusa’s client. This request expects the cart ID which you should have access to as well.
If you run your backend and storefront now, you’ll see the Stripe UI element and you’ll be able to make orders.

Capture Payments
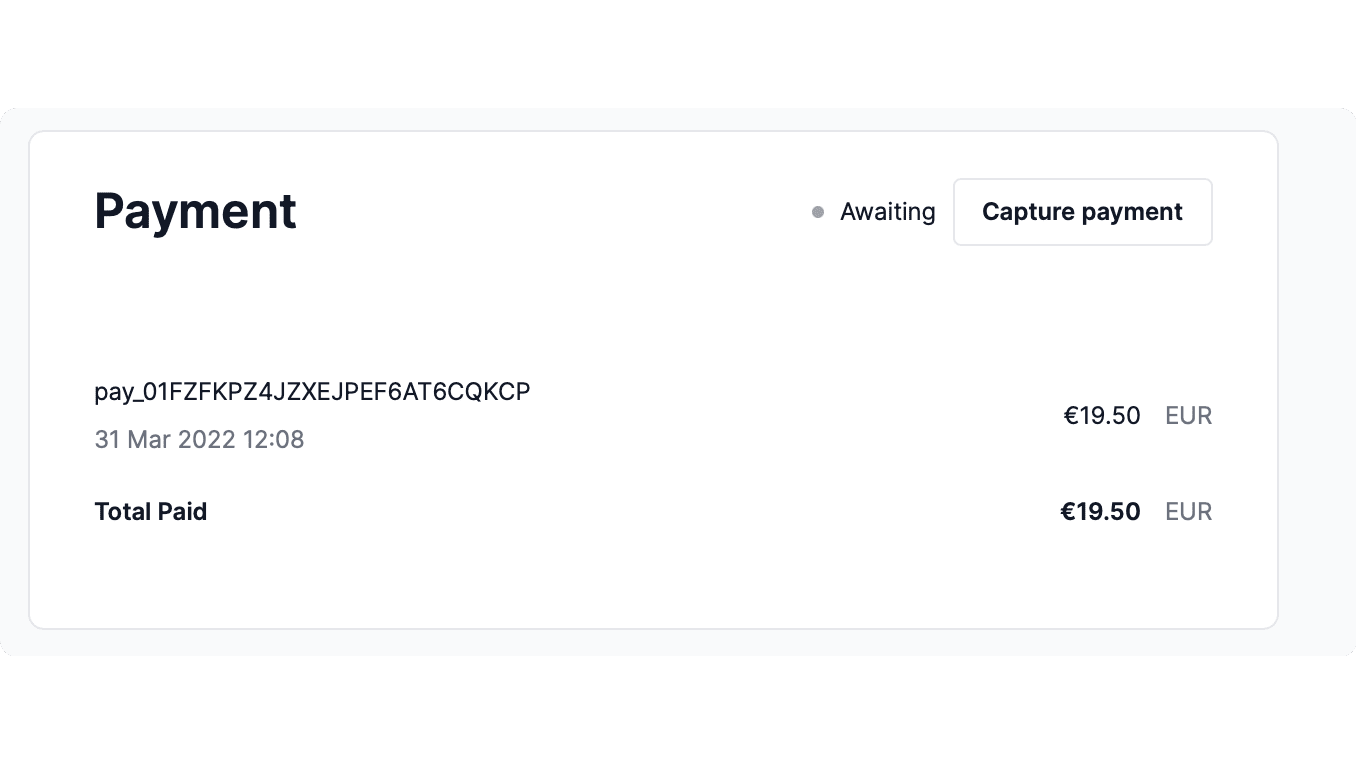
After the customer places an order, you’ll be able to see the order on the admin panel. In the payment information under the “Payment” section, you should see a “Capture” button.

Clicking this button allows you to capture the payment for an order. You can also refund payments if an order has captured payments.
Refunding or Capturing payments is reflected in your Stripe’s dashboard as well. This gives you access to all of Stripe’s analytical capabilities.
Handled Webhook Events
This plugin handles the following Stripe webhook events:
payment_intent.succeeded: If the payment is associated with a payment collection, the plugin will capture the payments within it. Otherwise, it checks first if an order is created and, if not, completes the cart which creates the order. It will also capture the payment of the order associated with the cart if it's not captured already.payment_intent.amount_capturable_updated: If no order is created for the cart associated with the payment, the cart is completed which creates the order.payment_intent.payment_failed: prints the error message received from Stripe into the logs.
Troubleshooting
Stripe not showing in checkout
See Also
- Check out more plugins you can add to your store.